Tuesday, April 23, 2013

Buying a home - Start New Buy Fresh


I wasn't expecting to buy my own home for several more years down the road.  As a single mother, I figured I'd be a renter well into my 40s.  I was fine with renting.  I didn't have to worry about any repairs or lawncare.  I also didn't have a lawn in the condo I had been renting for 4 years.  I longed for something other than low end cabinetry and white appliances.  Although we were living in a newer condo, you can only do so much to spruce up a rental property.  My aunt is a realtor and suggested that I talk to a mortgage broker to see if I could pre-qualify for a loan.  I did, and I did.  I thought it was a bit absurd that anyone would loan me that amount of money for anything.  This was after the real estate crash and tight gripped loans.
I've now been in my home for 4 years.  I have beautiful custom cabinetry, granite counter tops and stainless steel appliances.  Sure, those things can be a bit superficial, but I love cooking in my large and open kitchen vs. the tiny condo corner kitchen.  I have enough counter space to set groceries on the counter and wash and prep with the kids doing homework at the counter.
new house
Before, I was tightly confined to a 2' space and we could barely fit all three people in the kitchen.  Now, my master bath is larger than my former kitchen.  The leather loveseat from the condo living room fits comfortably in my bedroom.  There is ample space to spread dozens of baking goods from oven to cooling racks to decorating space.
condo living
Probably the best feature of my house is the location/views.  This is what I see from my bed (yes, often a kid, but beyond the kid is snowcovered peaks, winding creek, protected wetlands, natural pond, soccer fields, and a park.  The kids' school is a few blocks away and a movie theater and restaurants are just down the street.
As a renter, I wouldn't have been able to turn the bedroom closet into an office:
Or handpaint the shower curtain design on the kids' bathroom wall:
I'm getting ready to hang wall-covering in my son's room and paint the front door a new color.  Aside from being able to personalize my home to suit our likes and personalities, it was important to me to buy new construction so I wouldn't have to worry about repairs or replacing appliances or roofs.

How about you?  Are you a home owner?  Still renting because you're not sure if you can qualify for a loan? You won't know until you apply.  For a great resource on buying a new home, check out BHI's Start Fresh Buy New website.

I was selected for this opportunity as a member of Clever Girls Collective, and the content and opinions expressed here are all my own.

Monday, March 18, 2013

Hand Painted Stool with FolkArt ® Handmade Charlotte™ Stencils


Handmade Charlotte stencils & Folk Art have come together to offer these darling Handmade Charlotte stencils.  There are several selections- from all-over patterned stencils to Celestial themed & even Party themed stencils.  I received the Party stencil pack along with jar of Plaid Chalkboard paint and every-color-of-the-rainbow Folk Art Acrylic Paints.
I was asked to paint a piece of furniture for this project, so I had already selected a plain wooden stool that I acquired when a neighbor moved and left it in their garage.    It has served as a base to elevate my humidifier in my bedroom.
This is the stencil pack:
At first I wasn't sure how I'd paint a furniture piece with a party theme, but soon enough, the ideas started rolling and I was super excited.  To start:   1.  Sand the entire stool.  2.  vacuum the stool to clear the dust.  3.  wipe the stool with a wet rag to remove any lingering dust.  4.  apply base coat of white semi-gloss paint.
The stool dried for approximately an hour before applying a second coat of white to the legs:
Then I applied two coats of teal paint to just the top of the stool:
Allow to dry an hour or so.
I wanted to create a chalkboard bunting across the top of the stool seat.  First, I placed the punched-out stencil pieces on the top for a visual and to figure out the spacing.  You might want to lightly trace the stencil so you can see where to line it up on the surface because the stencil is made of cardstock and is not see-through- making the lining up a little bit of a challenge.  Using the sponge brushes provided by Plaid, I worked from the outside and allowed enough time to dry between flags so I wouldn't smear the paint.  I ended up cutting the stencil apart and only used each flag once.  If you use the same one over and over, you have to be careful to let the paint dry completely on the stencil or you will smear the paint when you place the stencil back down.  I have not worked with chalkboard paint so I'm not sure of the consistency, but it seemed rather thin and as I dabbed with the brush, the paint bubbled.  It wasn't a big deal for me in this project because I have no intention of using chalk on the stool- it was more of a background color.
I had several projects going on this particular day, so I didn't mind walking away and allowing proper dry time between coats and stencils.  At first, I wanted to paint cupcakes in the center of the bunting, but the cupcake stencil was just a shy too big.  The ice cream cone stencil lined up perfectly.  I started with the tan cones and then added the ice cream colors.  Rather than leaving space between the cone and the ice cream (like the stencil, as shown), I placed the ice cream right on top of the cone and then did some shading so the cones wouldn't be just a flat stencil.
I was reminded how much I love to paint with this project.  My son even said, "I knew you could paint, but I had no idea you could do it that well, Mom!"  It has been a while.
After painting cherries on top and allowing to dry overnight,  I lightly sanded the top the following morning for a subtle distressed look.
I can't believe I had that plain ugly stool for so long before thinking to paint it.
No way is this stool going back under the humidifier!  My daughter and I used it for a cute photo shoot last weekend and now it is in her bedroom.  I still have several stencils left to use for other projects.  I'd rather have the stencils made out of plastic to wipe down after use, but the price point makes the cardstock work just fine.  
Thank you so much Plaid & Handmade Charlotte Stencils for the product and inspiration to bring this stool to life!   Follow Plaid on Facebook Plaid on Twitter Follow Plaid on Pinterest.

Tuesday, February 26, 2013

Mod Podge Photo Transfer Medium: Wall Hanging

I received a box of Mod Podge goodies a few weeks ago to make a wall hanging for my daughter's room.  We talked about what we'd make and came up with a fun project involving over a dozen women who have been a major support system in our lives.
The artwork I used for this project is by my awesome friend Holly of Spence Creative.  She is an amazing illustrator and I was so happy my daughter really connected with Holly's work.  Holly emailed me a few images that we could print for the project.  If you are using art with lettering, you must print in reverse.  I reversed the image in Photoshop and printed on regular multi-purpose paper.
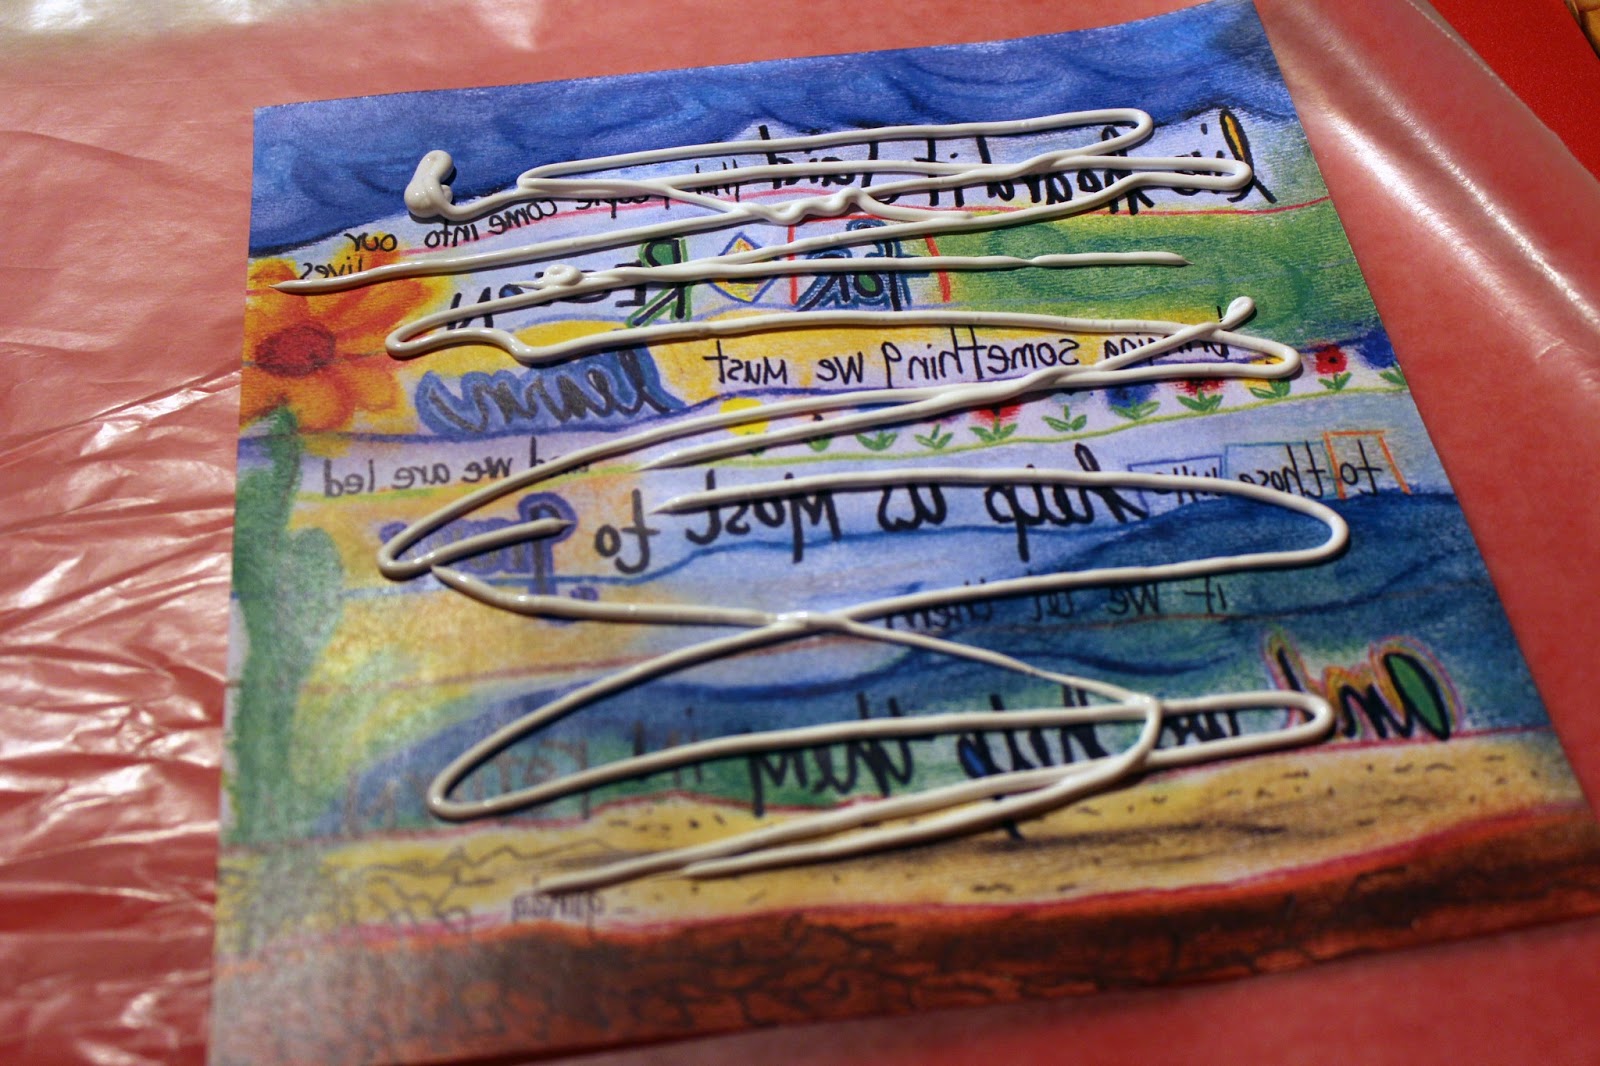
Cut the exact image you would like to use (i.e. do not leave a white boarder unless you want a white boarder for the final project).  Using the foam brush provided with the Mod Podge Photo Transfer Medium, coat the image with the transfer medium- making sure the entire surface and all edges are evenly coated.
Place the coated image print-side down on a fabric surface and smooth so there are no air bubbles.  Let the image dry for 24 hours.
 Using a sponge, wet the image and let set for 1-2 minutes.
Using a small circular motion, begin to remove the paper with the sponge.  The paper just crumbles away.
 Continue the circular motion until you remove all of the paper.
You may notice a white film once the image dries.  Dampen your sponge again to remove more of the paper fibers.  If you like a more vintage look, you can leave some of the paper fiber.
 The second image for the wall hanging, again compliments of Spence Creative:
 The images for the Podgeable Shapes:
 Removing the paper after 24 hours:
Trimming the images for the Podgeable Shapes:
I used the Gloss Mod Podge to adhere the images to the Podgeable Shapes and then sewed the two photo transfers into a wall hanging.  The bottom of the wall hanging has a clear plastic pocket to hold all of the Podgeable pendants.
 Now she can reach in for a pocketful of inspiration that she can take with her or wear on a necklace.
She loves it and I love having all of these strong women in both of our lives.

Follow Plaid Crafts on Pinterest
Like Plaid Crafts on Facebook
Follow Plaid Crafts on Twitter
Mod Podge
Visit Paint Me Plaid

Tuesday, February 12, 2013

Getting Kids Styled at Great Prices

I was telling my 3rd grade daughter about my 3rd grade Valentine's Day experience.  My mom made me wear a home sewn lavender and gray floral print shirt to school that day.  I begged her to let me wear something else.  I groaned.  I didn't like the big tie in the front that was made into a puffy bow.  She didn't see the big deal and insisted I wear the shirt. I wasn't winning the battle, so I wore the shirt and kept my big purple puffy coat for the entire day.  My sister had a matching pink shirt and it seemed to me that her shirt at least looked better in pink. I was hot all day.  I pushed my coat sleeves up as far as I could, but I was boiling under that coat.  By early afternoon, I was sitting in the nurse's room with a rash all the way up and down my arms.  I was STILL wearing my coat sitting miserably on the nurse's table.  A couple of classmates delivered me a cupcake, but I missed the Valentine exchange.  Oh, vanity is a silly thing.  Is it any wonder I have a daughter who is soooooo particular about her clothing? While we were in Denver over the weekend we made sure to stop by for Old Navy's Kids and Baby Sale happening now through February 20th.  Both kids picked out an armful of clothes and we headed to the fitting rooms.  When my daughter removed her big clunky snow-boots  this is what I saw.  Clearly, she was in dire need of at least one pair of new socks...that she'll hopefully wear as a matching pair. When she spotted the gray puffy coat with fur trimmed hood and asked me if she could have a new coat, I hesitated.  Another coat?  She said it was $12.  Who can pass up a $12 coat?  I told her to try it on and it immediately fell into the "we're getting this" pile.  My son picked out a black sherpa hoodie and has not taken it off for two days.  The tag said $13, but when the woman was ringing us up she commented, "Actually that rang up at $3.47!"  Can't beat that deal!  Check out all of our deals...
We went to Old Navy.com when we got home and placed an order for more great deals.  My headphone-wearing, snowboarder, penguin loving son spotted a blue long sleeve shirt with a penguin wearing headphones and strapped into a snowboard with the word "shred".  It was MADE for him.  He ran upstairs and came back down with $6 towards the $8 shirt.  My favorite part of shopping Old Navy online is the link up with Athleta.  I forgot I left a shirt in my Athleta shopping bag and it added it to the Old Navy order and qualified for Free Shipping. Hmmmm....we ended up with a puffy coat.  Not shiny royal purple like mine, but close.  Good thing she really likes the pink lace heart shirt she'll wear beneath the coat on Valentine's Day this year!

I was selected for this opportunity as a member of Clever Girls Collective, and the content and opinions expressed here are all my own.